Boiler Fittings
This is where the project became really tedious. Each loco has a chimney, dome and two safety valve covers. Each of which has a saddle to fit the curve of the smokebox, bolier or firebox. And to make it worse, the dome and safety valve covers are finished in polished brass. On later LNWR locomotives they were painted in the body colour, but the one photo of this class clearly shows them polished, and contemporary photos of other classes are the same. That matters because it means I have to get rid of every machining mark, including the fine ones that I can expect to be covered by a coat of paint. The problem, of course, is the saddles. Everything else (well, almost everything) is a straight forward turning job.
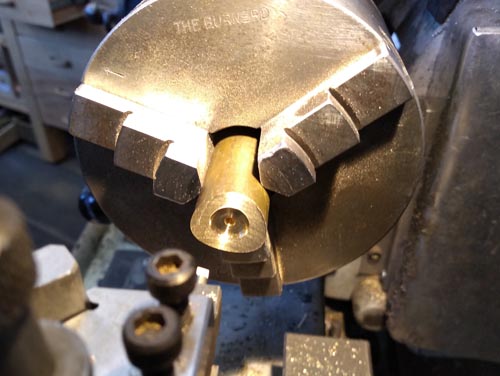
So here is how I made a saddle. A blank slightly larger than the maximum diameter of the fitting was set horizontal in the mill, and one end was cut concave to the correct smokebox or boiler diameter using a fly cutter. The blank then went in the lathe, was drilled through for a securing bolt and a flat face was made on the base.
So here is how I made a saddle. A blank slightly larger than the maximum diameter of the fitting was set horizontal in the mill, and one end was cut concave to the correct smokebox or boiler diameter using a fly cutter. The blank then went in the lathe, was drilled through for a securing bolt and a flat face was made on the base.
Nick Baines • Model Engineering
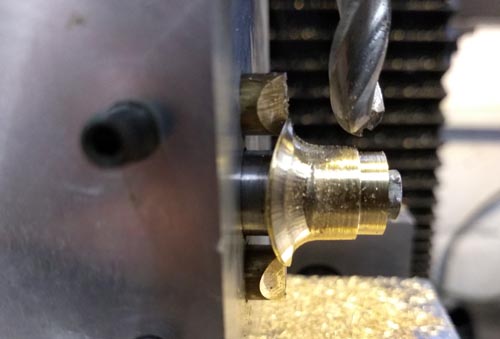
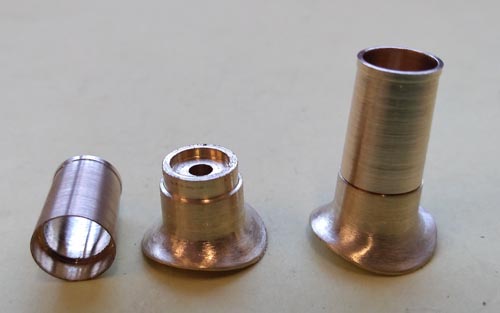
That is not the end of the story. The radius of curvature of the flare is not constant around the periphery of the fitting. It is larger at the sides than at front and rear, and while the front and rear may be simple circular arcs, the sides certainly aren't. It is necessary to vary the height of the cutter and the depth of the cut, judging the profile of the flare as it evolves by eye. I recommend the first time you try it, practice on some test pieces first. But with care and patience, this is the sort of result to expect.
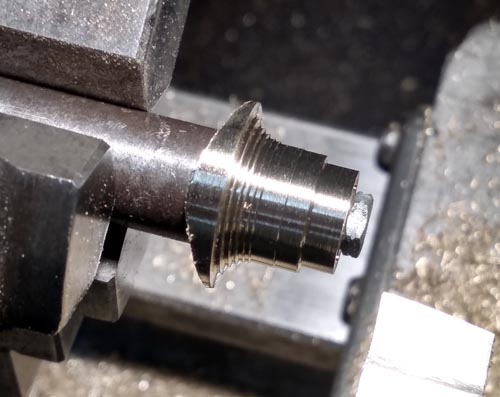
The face allowed it to be bolted to an arbor and mounted in the chuck, top end out, for turning. As much material as possible was removed that way, making a series of steps where the flare occurs.
Did I mention patience? This is where it really gets tried. The final shape has to be filed by hand. I recommend rifler files, which are curved files readily available from good tool suppliers. Start by filing, then use successively finer grades of emery to achieve a good finish. Inspect it often, and look how the light reflects from it. That will show up any unwanted bumps and dips. Then, if the final product is to be polished, use metal polish on it. Don't wait until it is on the model and painted, do it now and once again check the shape.
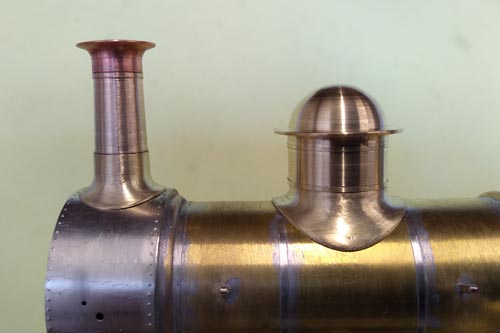
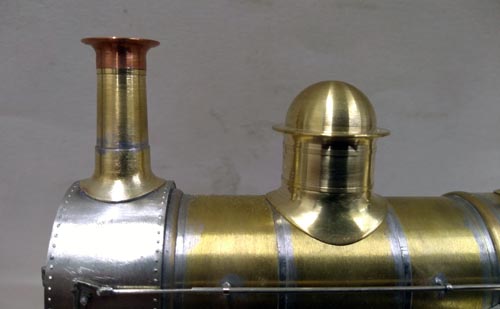
Then take a photograph. Your eyes overlook a lot, particularly when you have been going at it for a few hours, but a photo gives you a fresh perspective. This is an example. I photograhed the chimney and dome sitting in their places, and it is immediately apparent that the saddle of the dome is still much too thick on the sides where it wraps over the boiler barrel. More metal had to come off there.
Then take a photograph. Your eyes overlook a lot, particularly when you have been going at it for a few hours, but a photo gives you a fresh perspective. This is an example. I photograhed the chimney and dome sitting in their places, and it is immediately apparent that the saddle of the dome is still much too thick on the sides where it wraps over the boiler barrel. More metal had to come off there.
The dome is an extreme case because it is so large in relation to the boiler. It took the best part of a day to finish the base of each dome. If that sounds excessive to you, choose a prototype for which there is a casting available, or persuade someone to cast or CNC it for you.
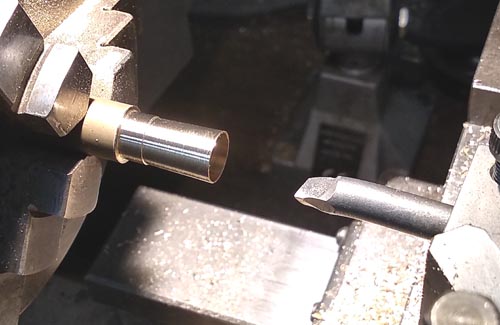
As I said at the beginning, the remaining components are turned. This is the stem of the chimney which has a slight taper, and was turned and bored out at one setting.
As I said at the beginning, the remaining components are turned. This is the stem of the chimney which has a slight taper, and was turned and bored out at one setting.
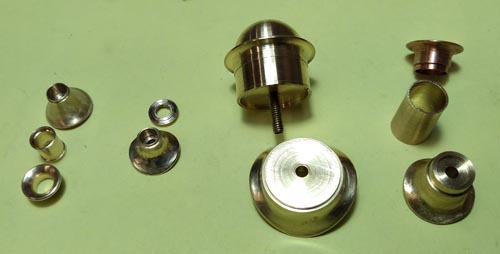
This photo shows all the component parts of one complete set of fittings, which were then soldered together. The chimney was soldered to the smokebox, and the other fittings are screwed in place so that they can be removed and polished (again) at the painting stage.
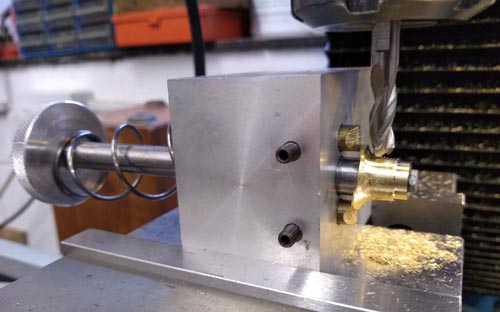
Here is the clever bit. The workpiece goes back on the mill, this time in a gizmo that allows it to be rotated with the saddle running on two diametrically opposed edges so that as it rotates, it moves axially according to the profile of the saddle. A ball end cutter is brought in vertically and material is removed.
The rotation is done by hand using the knob on the left. The spring helps to keep it pressed up against the edges but I also pull it with my hand. The cuts are, of course, small ones.
The rotation is done by hand using the knob on the left. The spring helps to keep it pressed up against the edges but I also pull it with my hand. The cuts are, of course, small ones.
It looks better now.
That completes the loco for now. There are a few fittings still to attach permanently, but they will wait until after painting. When I am building I am thinking about access for painting and lining (even if I am giving it to someone else for those jobs), because it makes it easier and I think you get a better end result.


